Adobe Photoshop Tutorial on Cropping and Resizing
Here at InkFX we see hundreds and hundreds of files every week from hundreds and hundreds of different photographers. Some Professionals, some Semi-Professional and some Amateurs, this is why we have made this article on How to Crop and Size Your Images and we hope you like it! 🙂
Some people know how to crop and size their images correctly and therefore get a consistent result every time with their Photography while others struggle.
I’d like to cover some basics with Cropping and Sizing your images to help make it super easy for you to know what to do and how to get the most out of your images irrespective of the size or shape you’re wanting to order.
Sound Good?
If so let’s get started!
OK, the first thing I want you to do is in Photoshop go to IMAGE > IMAGE SIZE menu
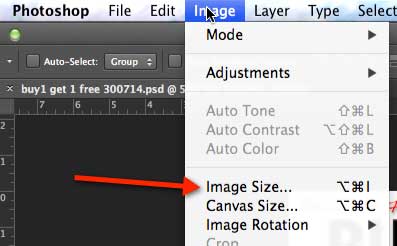
This will tell you what size your image is currently before any enlarging or cropping.
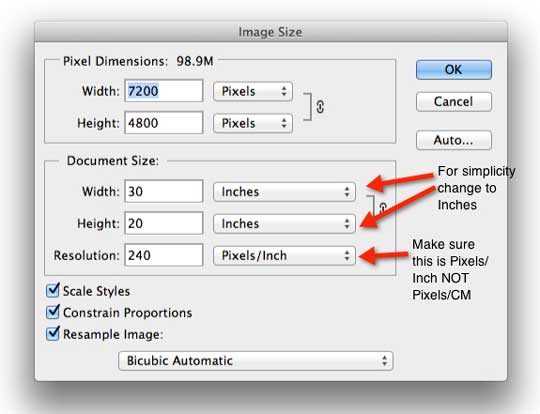
In this example you can see it’s 7200 x 4800 pixels. We’ve set our Default to Inches, if you see something else there in the Document size section you can change it to show you in Inches too.
You will also see the resolution is 240 Pixels/Inch. Occasionally we get files from clients where it is set to 300 Pixels/CM which is a mistake as 300 Pixels/CM is super excessive.
Resolution For Photo Paper or Aluminium HD Metal
As a basic rule for Photographic prints on Photographic paper OR for Aluminium HD Metal 300 Pixels/Inch is perfect. 240 will work too.
Resolution For Canvas
As a bare minimum 150 Pixels/Inch works up to 240 is fine 🙂 300 Pixels/Inch for Canvas is more than enough.
OK So what do we do if your file is smaller and just doesn’t have enough pixels? e.g. It doesn’t meet the minimums above?
We CAN enlarge your file and effectively add pixels to get it to where it needs to go. As a rule of thumb we can enlarge to 400% no problems.
We can either use Photoshop or one of our specialist Enlarging Software Programs (PhotoZoom Pro or On One Software Perfect Resize) designed purely for specialist enlarging of images. They give EXCELLENT results!
As our clients who have had us enlarge their images would testify we are able to get amazing results by the way we enlarge files and then print them 🙂
BUT don’t let that stop you doing it yourself. Even if you use Photoshop you can get EXCELLENT results.
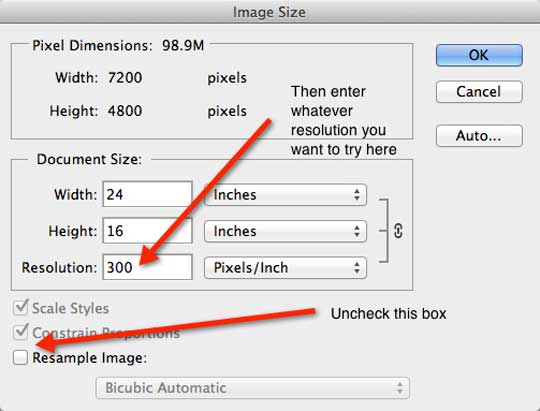
If you uncheck the ‘Resample Image’ check box this will make sure when you change any of the Document Setting sizes that it doesn’t try and resample the image and add or remove pixels from the file.
It will allow you to see what size you can make your image at what resolution as it currently is!
Give it a go. Uncheck the box and then change the resolution from whatever you have to 300 Pixels/Inch and then see the Document Size change.
In this case you can see when I changed the resolution from 240 to 300 Pixels/Inch the Width and Height changed from 30 x 20 Inches to 24 x 16 Inches and in the Pixels Dimensions box above it there was no change from 7200 x 4800 pixels.
Tip: You can always email your image to us first for us to have a look at and we will tell you HONESTLY what size we can go to for the best result! (that is a FREE service!)
So that will give you a good idea on how big your image is and what sort of resolution you have.
OK now you know how to do that and have a look at that. Let’s go to the first step I would normally take when I’m assessing an image.
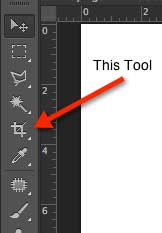
Step 1
Select the CROP Tool.
Step 2
In the Options Bar enter the size that you want your image to be e.g. if you’re ordering a 20×30″ Canvas then enter the Width first and then the height as shown here:
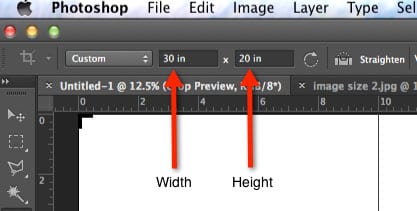
Then you will see on your image the crop overlay come up and if it goes right to the edges left and right and top and bottom then your image is in the right proportions for what you want to order and nothing will need to be cropped!
Simple hey?! 🙂
If you see the crop tool overlay over your image and you find that there are bits of your image that are hanging off the edges then it means that some of your image will need to be cropped.
Step 3: Once You’ve Cropped your Image…(then what?)
OK, so you’ve done the deed and cropped your image. Now what? Well all that is left is to check that the resolution is sufficient for print. IF it’s not you have 2 choices…
1. Submit it with your order without resizing it and we can resize it for you. (not the best option)
2. Resize your image (Resample) in Photoshop or one of the Photo Enlarging programs that make it super easy and give you a super great result. Use the guide above regarding minimum DPI depending on what your image is going to be printed on.
If you have ANY questions about this please leave a comment below and I’ll do my best to answer them and help you out!
Excellent blog post Shane, good simple explanation for those that may not be in the know